How To Add local Terminal Server User
Below are the steps required to create a new user account within Windows Server 2016 and Make sure that the user is a member of the Remote Desktop Users Windows group.
While Windows Server 2016 offers some new interface options and menus that can be used to add or manage user accounts, it also includes the same Local Users and Groups menu that Server 2008 R2, 2012, and Windows 7 featured. The only difference is in how that menu is accessed. We'll be using the classic Local Users and Groups menu in this guide, as it will likely be familiar to anyone who has used previous Windows operating systems.
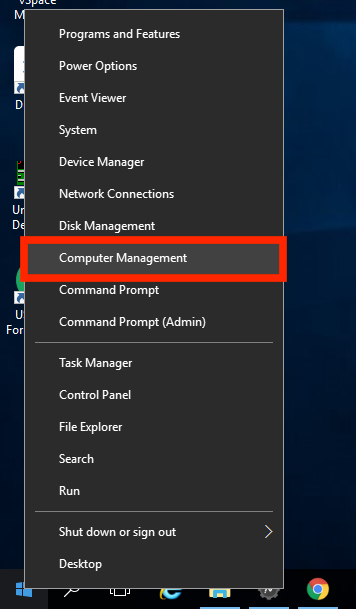
1. Right click the Start Menu and choose Computer Management.


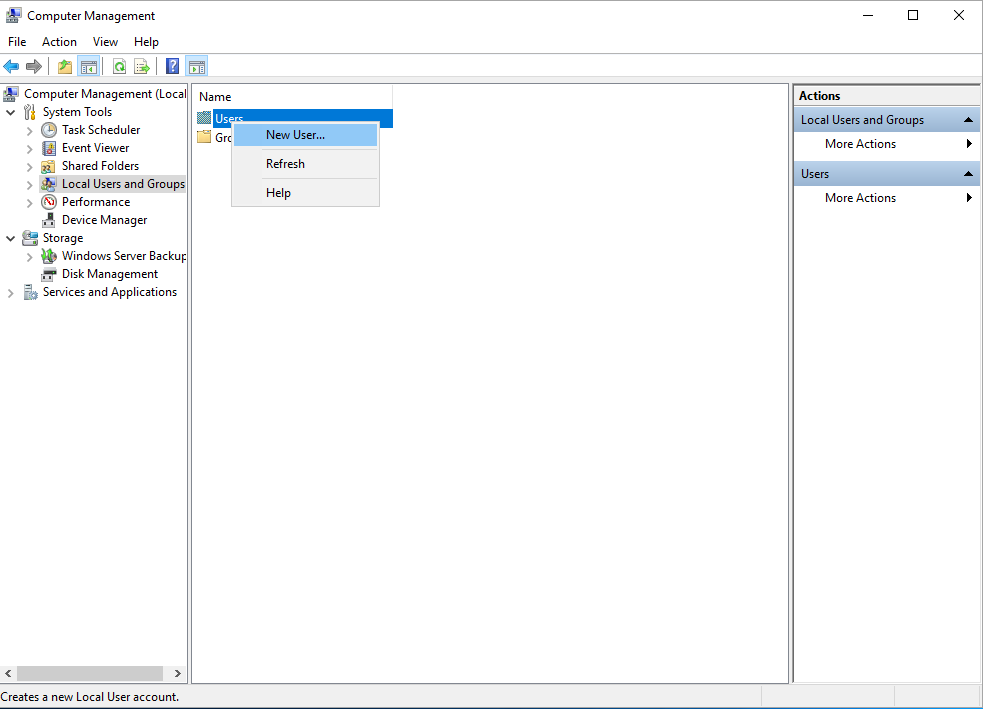
2. In the Computer Management window click on Local Users and Groups and right click the Users folder. Select New User
. In pop-up window enter your desired username and password then click create.
 NOTE Be sure to give the new user the proper permissions.

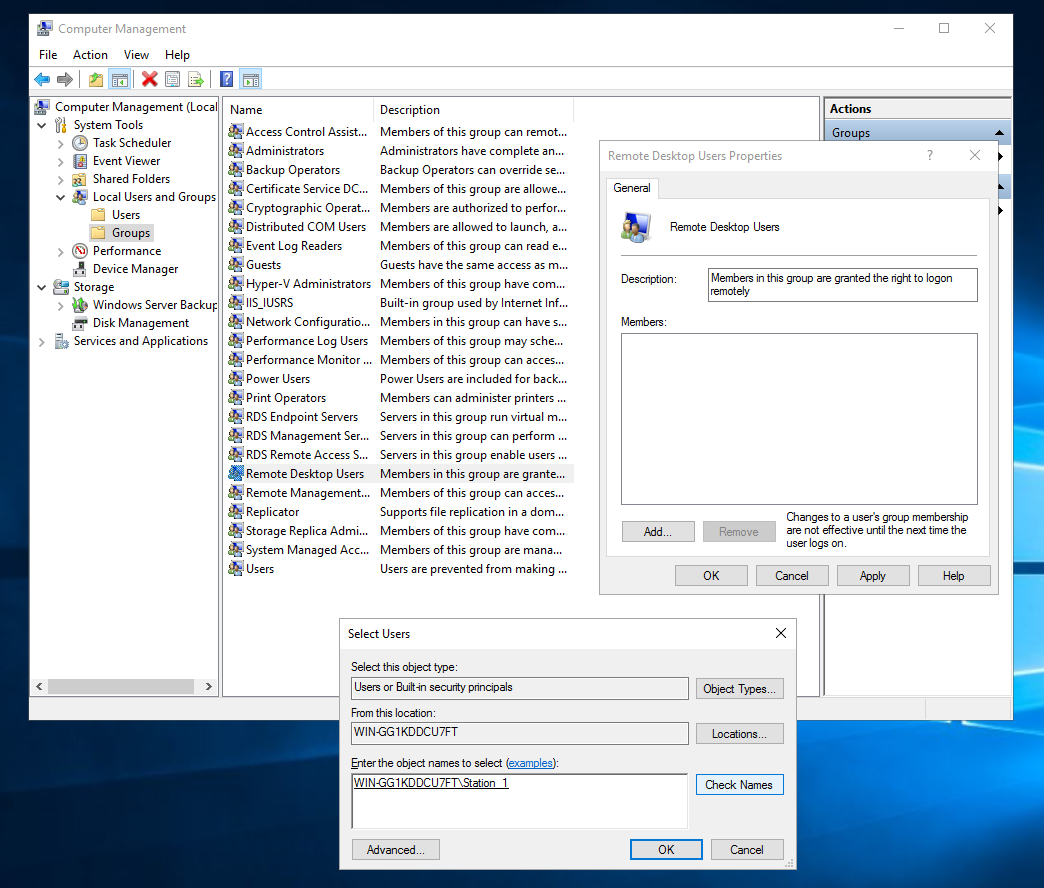
3. Once you create the user, you can then go to the left pane in the window and expand Local Users and Groups, then, click the Groups folder and double click Remote Desktop Users Group.
4. Click Add. Then, in the Select Users window you can enter the name of the session you just created in the given field. Click on Check Names next to it and the name will become underlined as an indication that the user was found and accepted.
2. In the Computer Management window click on Local Users and Groups and right click the Users folder. Select New User
. In pop-up window enter your desired username and password then click create.
 NOTE Be sure to give the new user the proper permissions.
 3. Once you create the user, you can then go to the left pane in the window and expand Local Users and Groups, then, click the Groups folder and double click Remote Desktop Users Group.
4. Click Add. Then, in the Select Users window you can enter the name of the session you just created in the given field. Click on Check Names next to it and the name will become underlined as an indication that the user was found and accepted.
Related Articles
iFix Terminal Server Add User with auto login
Requirement We need to add a new RDP user to iFix for remote connection. This use needs a node name and the auto-login should log them into guest as a best practice. Environment Primary Product Module : GE iFix Primary Product Version : 5.8/5.9 ...B&R Installer Fails at "Provide License": "The user don't trust the certificate or the admin policy has disabled user trust. Error: 0x80096005"
Using the Backup and Replication 9.5.4.2866 Update 4b iso, the Veeam installer will fail after at the "Provide License" dialogue with the following error: "The user don't trust the certificate or the admin policy has disabled user trust. Error: ...XL Reporter, Team Explorer, Historian Excel Add-In
Symptom XLReporter`s Team Explorer extension not functioning properly with reports using Historian Excel Add-In Environment Primary Product Module : Team Explorer Primary Product Version : 12.5 Primary Product OS : Windows Server 2012 R2 x64 Cause ...Auto-start applications in windows when a user logs on
Symptom The user desires to have an application(s) to start automatically when a user logs into the node. Environment Primary Product Module : Microsoft Windows (Desktop & Server) Primary Product Version : ALL Primary Product OS : Windows Resolution ...GE Licensing, Re-Install of Common Licensing & Proficy License Server
Environment: Primary Product Module : GE Control Server - Simplex / HA Primary Product Version : CSv02.01.00C Primary Product OS : Windows Server 2012 R2 Cause: The GE Licensing - Local License Server Administration Tool does not get installed while ...